Questions?
Contact us at support line.
US: 877-270-3475
or
Log in to back office to chat with a representative
Contact us at support line.
US: 877-270-3475
or
Log in to back office to chat with a representative
Visit NCR.com/Silver
Browse by categories
You can create user roles that define the access available to each employee in both Silver Back Office and the POS app. The size, layout, and policies of an operation, as well as the number of employees, determine the user roles you need to create and the access you need to assign to each user role.
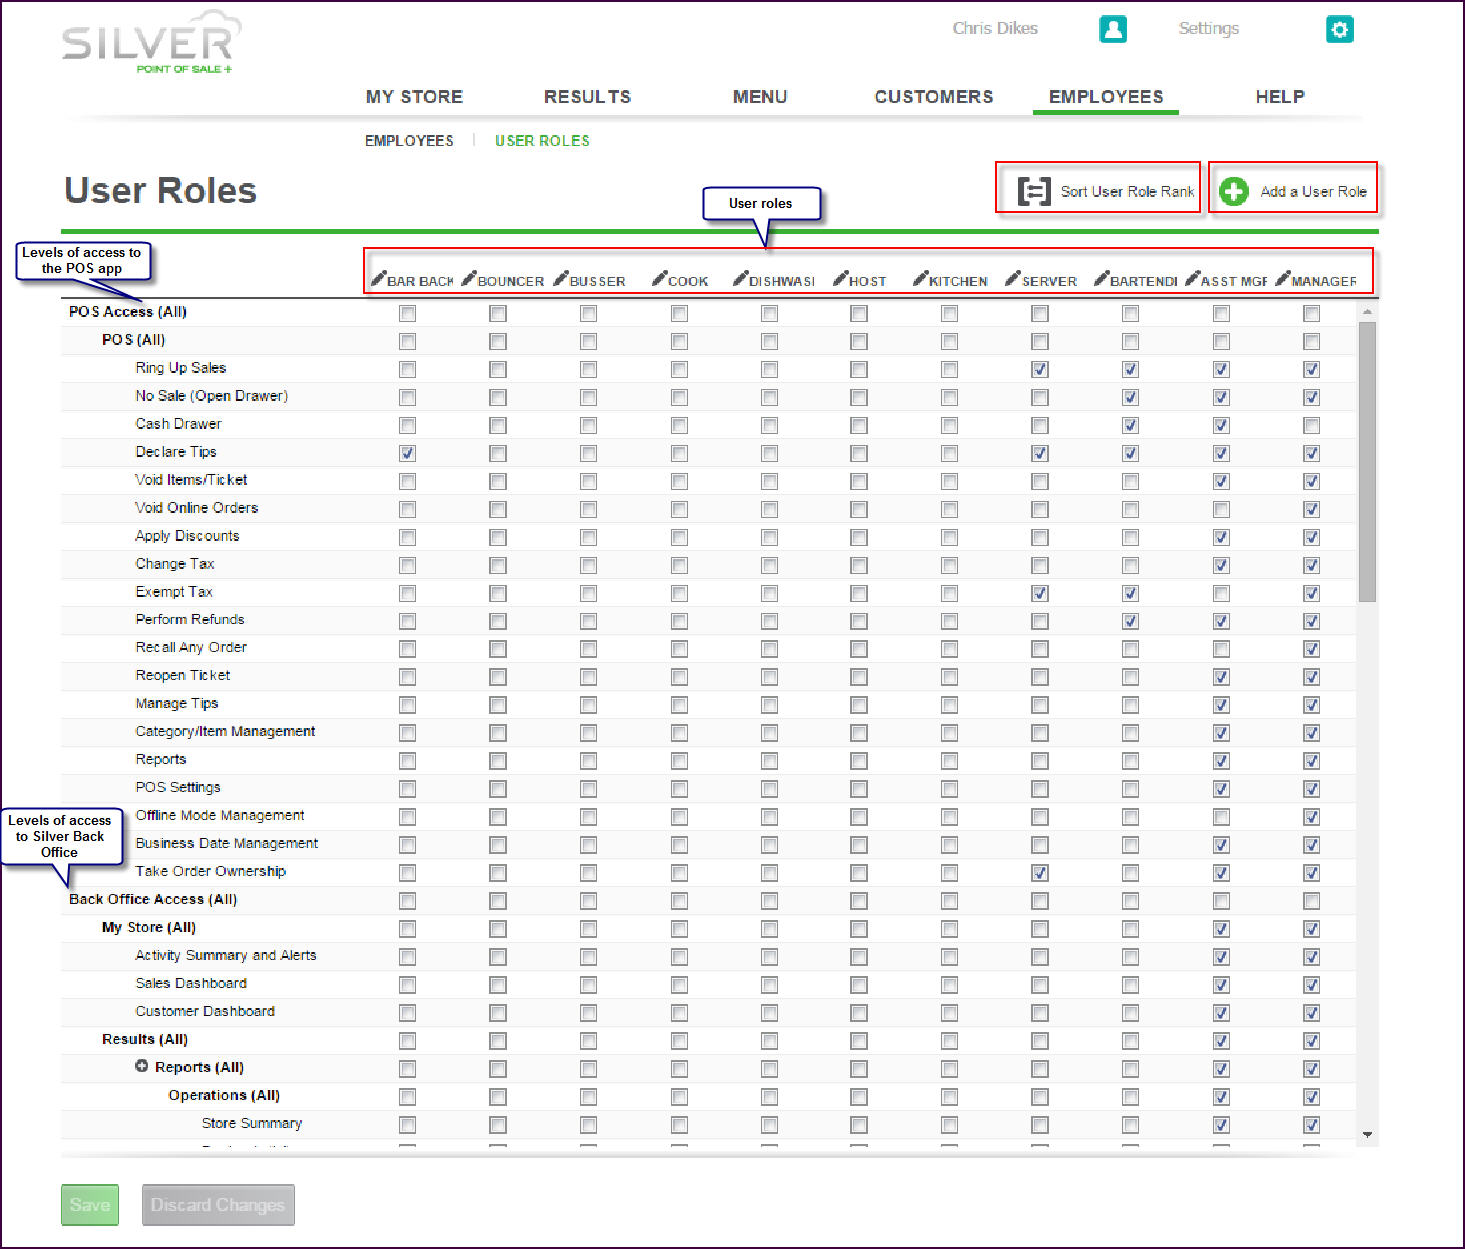
NCR Silver Pro Restaurant provides three default user roles; however, you can add additional user roles and remove the default user roles, with the exception of Account Manager. You then assign the appropriate level of access to each user role and assign one or more user roles to each employee. Additionally, you can rank the user roles that access Silver Back Office. This prevents an employee with a lower ranked user role from changing their user role to one with a higher ranking. At the USER ROLES screen, user roles appear in order of ranking from lowest to highest, from left to right.

To create a new user role:

NCR Silver Pro Restaurant provides three default user roles; however, you can add additional user roles and remove the default user roles, with the exception of Account Manager. You then assign the appropriate level of access to each user role and assign one or more user roles to each employee. Additionally, you can rank the user roles that access Silver Back Office. This prevents an employee with a lower ranked user role from changing their user role to one with a higher ranking. At the USER ROLES screen, user roles appear in order of ranking from lowest to highest, from left to right.
To create a new user role:
-
Log in to Silver Back Office through a Web browser.
-
Select EMPLOYEES > USER ROLES.
-
Click Add a User Role. The Add User Role prompt appears.
-
Type a name for the user role, such as Bartender or Server.
-
Type a standard pay rate for the user role. The pay rate you specify here becomes the default payment rate for the user role; however, you can override the standard payment rate for an employee at the EMPLOYEE screen.
-
(Optional) Check box to exclude from labor reporting calculations. This feature allows salaried user roles to clock into the POS without impacting labor calculations.
-
Click Save Changes to return to the User Roles screen.
To rank user roles:
-
Select EMPLOYEES > USER ROLES.
-
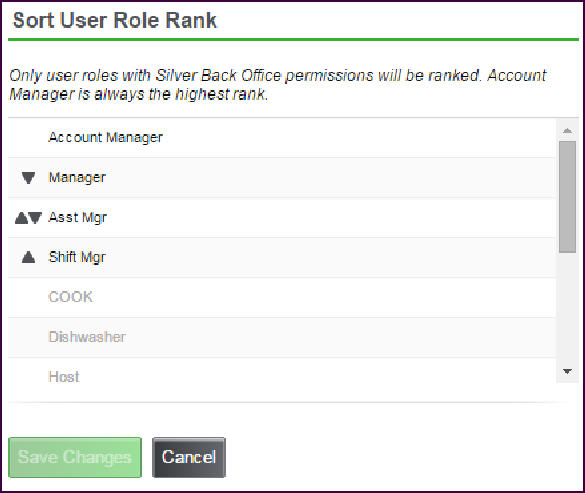
Click Sort User Role Rank.
-
Click
to increase the rank of a user role or click
to decrease the rank of a user role. You can only rank the user roles that access Silver Back Office.
-
Click Save Changes.
To assign the appropriate access to each user role:
-
At the User Roles screen, for each user role listed across the top of the screen, select the appropriate access from the options available on the left of the screen. The first section from which you make selections controls access to the POS app, and the lower section controls access to Silver Back Office.
-
Click Save and exit the User Roles function.
Once you create a new user role with the required access, it is necessary to assign that user role to the appropriate employees.
Understanding the Account Manager User Role
The Account Manager user role automatically has complete access to everything in Silver Back Office, and this user role is necessary for registering hardware, accessing devices, and for viewing your bill. The system assigns the Account Manager user role to the individual who signs up for the account; however, you can re-assign the Account Manager user role to another individual, as well as assign this user role to multiple individuals. This user role is a Silver Back Office user role only; it is necessary to also assign each individual with the Account Manager user role another user role that provides access to the POS app.
See also:
Adding an Employee
Understanding Levels of Access to the POS
Understanding Levels of Access to Silver Back Office
See also:
Adding an Employee
Understanding Levels of Access to the POS
Understanding Levels of Access to Silver Back Office
